


Half Square Triangles, affectionately known as HSTs are one of the most versatile and commonly used components of quilting blocks. I’ve never counted, but I’m sure there are literally thousands of basic and complex designs that are based on this simple little unit. But when it comes to matching points, there’s nothing that can make you throw a toddler-style fit quicker than a Half-Square Triangle.
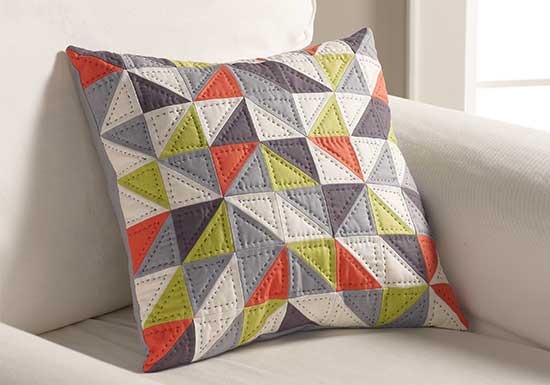
This month’s Coats and Clark email newsletter featured a really stunning Spinning Arrows Pillow constructed entirely of Half Square Triangles in solids. It’s finished with terrific, modern hand quilting using Coats Cotton Covered Bold Hand Quilting Thread and I totally fell in love. Since I’ve rarely pieced anything but squares and rectangles, it looked pretty daunting to me, though. So, I went looking for help and found it in a fabulous post by Amy of the Diary of a Quilter blog. If you’ve struggled with HSTs in the past, you will LOVE this!

To start with, Amy has a really smooth method for the initial stitching of HSTs. If you’ve been cutting your squares in half before sewing, stop. You’ll love her mark, then stitch, then cut method and never turn back.
Next, Amy introduces a ruler that I’ve seen before, but had written off as “too complicated for me”. Not so, says Amy, who had also seen the ruler and not paid much attention. You may even have one hiding in the back of your ruler drawer – go check. Since Amy’s discovered the wonders of this super tool she’s basking in the joy of making successful Half Square Triangles and you can, too!
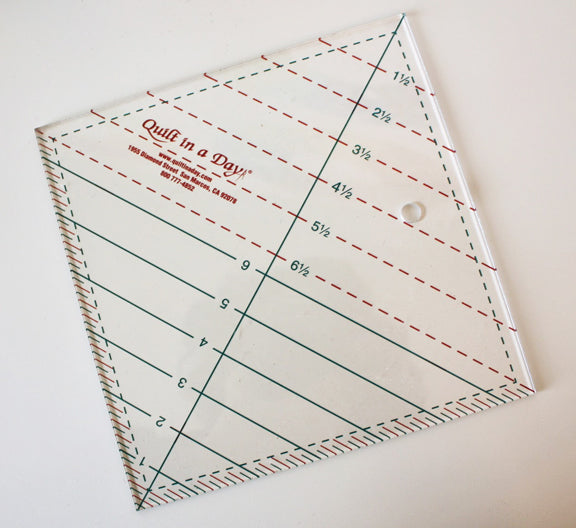
The ruler is the Quilt In a Day Square Up Ruler recommended by Eleanor Burns. How I could have ever doubted Eleanor, the Grand Dame of Quilting, is beyond me. You see, the secret key to creating HSTs with points that easily match is . . . squaring up! I learned in quilting class that the magic of matched points lies in the squaring up, but I had no idea it could actually be so easy.
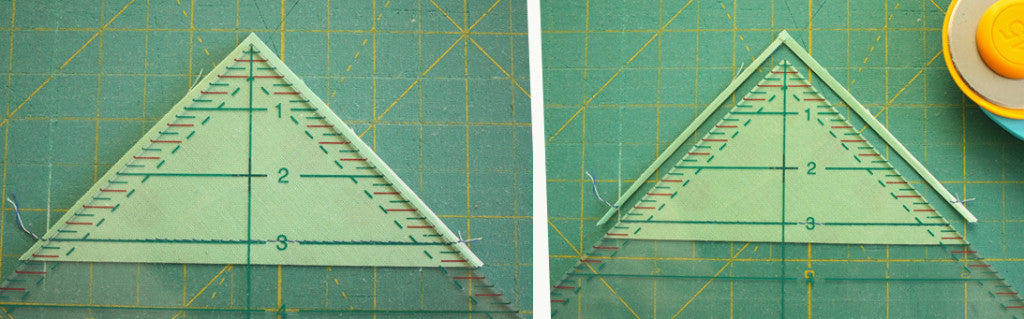
Amy demonstrates step-by-step how to use the Square Up Ruler beginning with a 3” Half Square Triangle pair that has been stitched, but not pressed open. It’s as easy as turning the ruler on point, matching up the 3” line on the ruler with the stitching line on the HST pair and squaring up the top edges of the triangle. And, there it is – a perfectly squared up Half Square Triangle! Click here for Amy’s tutorial.
So, let me know how this goes for you. I’d stick around to watch you start, but you see . . . I’m half way out the door on the way to my local quilt store to buy a Half Square Triangle ruler! If you’d like to join me, click here to learn more about the ruler then check with your own LQS.
Power to the Half Square Triangle quilters – there’s no stopping us now!!
