


Welcome Lori Harder! Lori is a designer who creates projects for Coats & Clark, FreeSpirit and other companies in the home sewing industry. Today she shares her pattern hack for variations on a basic T-Shirt.
Wild Side Leopard Tunic and French inspired Striped Top
My wardrobe was in dire need of updating and I decided to add some simple fashion tops out of stretch knits with lots of style. Coats has a fantastic new thread for sewing on knits without using stretch stitches or having to stretch the fabric, called Eloflex, so I thought I would give it a try. The results were wonderful! I’ve gotten smart in my sewing and try use the least amount of pattern pieces possible. I then use an interesting print to get the most sophisticated look & style. For my Leopard Tunic and Striped tops, I followed the basic instructions for drafting a t-shirt pattern from a student leaflet from Coats & Clark’s archives.
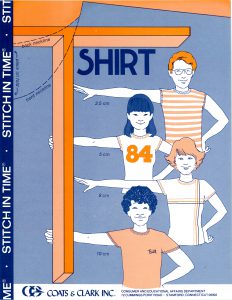 Coats & Clark Stitch In Time Student Leaflet from 1978
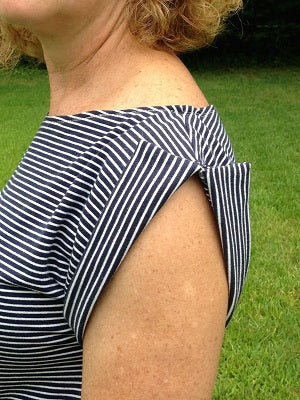
I added a little pizazz to each one. For the scoop neck leopard print tunic, I added a split sleeve joined at the sleeve hemline and neckline. It exposed the shoulders and looked great belted. For the stripe boat-neck top I added cuffs for a sporty French look.
Each started with these basic instructions. Click here for a downloadable version of this leaflet
Take a walk on the “wild side” with this Leopard Tunic.
Follow the leaflet to create the pattern and modify it with my steps below.
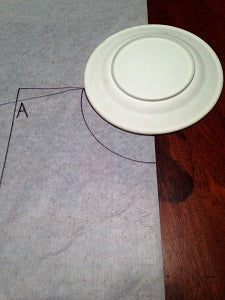
Drafting Neckline: For scoop neckline use a 9 1/4″ plate. Place the plate on pattern so that center front of neckline measures 5 1/2″ down from top of rectangle and center back 3 3/4″ down. Center front on pattern piece measures 26″ down from neckline to hip for tunic length and center back 28″.
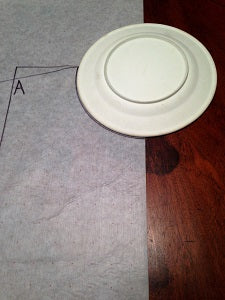 Use a plate to create the scoop neck in the front.
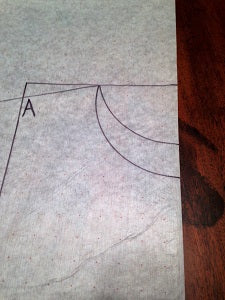
Drafting Sleeves: Sleeve length is 7 1/2″ from point A to point E at shoulder and 5″ at underarm seam from point B to point D.
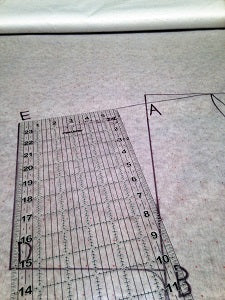 Sleeve length is 7 1/2″ from point A to point E at shoulder and 5″ at underarm seam from point B to point D.
Drafting Side Seam: For tunic length bottom of pattern piece use hip measurement + 1 1/4″ divide by 4.
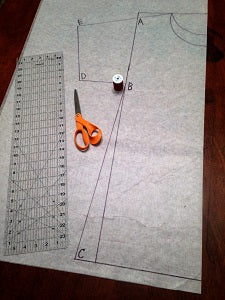 Drafting Side Seam. Shape underarm curve with thread spool
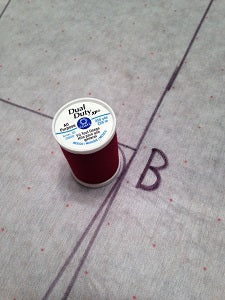
Scoop or boat neck line Shoulder seams: At neckline stitch only 3/4″ down from top and reinforce by backstitching and forward stitching over it again. Then stitch shoulder seam from sleeveline toward neck only 1″, then back and forward stitch over it again. This leaves the rest of the shoulder seam in between open. Fold shoulder seam allowances under and press. Topstitch 1/4″ away from shoulder seams down length of sleeves on each side.
Finish neck edge: Stabilize neck edge by using Dritz Stay Tape if knit is very stretchy. Cut a length of Stay Tape 1/2″ longer than neck edge. Turn neckedge under 3/8″, while also pinning Stay Tape to underside. Starting at center back place Stay Tape along wrong side of neck edge. Press and topstitch in place 1/4″ away from edge.
Side and underarm seams: When drawing side seams – center front and center back to point C should be one fourth of the hip measurement. To get a fitted shape on side seams after side seam is stitched, try on the top. Pinch in side seams at waistline and pin. Measure from seam to pin and mark. Turn top wrong side out and use a Dritz Curve Ruler to redraw side seams at waistline and hips. Restitch the side seams.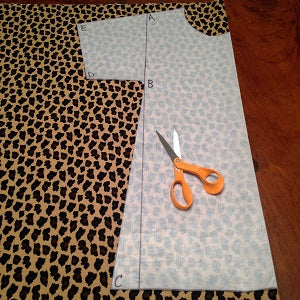
Finish sleeve edge: Turn under 1/2″, press and pin. Topstitch 3/8″ away from edge. Stabilize sleeve edge on wrong side at shoulder seams by using 2″ pieces of Stay Tape and stitch in place over original stitching.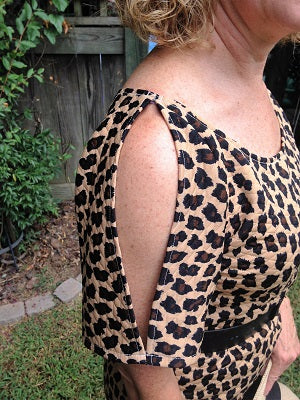
Finsh hem edge: Turn under 7/8″, press and pin. Topstitch 5/8″ away from edge.
French inspired Striped Top
For this top, I modified the neckline to be a boat neck and added a sew on cuff.

 Mark 3″ down for Boat-neck
Neckline: For boat neckline measure 3″ from top of rectangle down center front and mark. Measure 6 1/2″ out to side from top center front and mark, which will be side neck edge. From this point, draw a perpendicular line from top of rectangle 1/2″ straight down and mark as a dot. At 9″ out from center front and 1″ down label as point A. Connect dot to point A and and continue with drawn line 1 3/8″ longer than point A which will be shoulder and sleeve seam. Using a Dritz Curve Ruler draw a slightly curved line from side neck edge to 3″ mark at center front. Point B to D is 3/4″ long at underarm.
 Scoop or boat neck line marked on pattern
Length of center front and center back on pattern pieces each measures 21″. Fold neck edge under 3/8″ and topstitch 1/4″ from edge.
Sleeve cuffs: Once shoulder, side and underarm seams are completed, measure armhole opening and add 1 1/4″. Cut this measurement (mine was 19 1/2″ + 1 1/4″ = 20 3/4″) which will be cuff length. Cuff width of pattern piece is 2 1/4″ x 2. Cuff pattern piece is 20 3/4″ x 4 1/2″. Fold cuff long edges wrong sides together. Stitch 5/8″ seams on each short end, then trim to 1/4″. Turn wrong side out and press. Stitch long edges of cuff to wrong side of sleeve edge matching the sewn short edges at top shoulder seam. At underarm seam fold cuff in half lengthwise covering sleeve and cuff seam so that cuff width measures 1″. Hand tack at underarm. Press cuff up so top of cuff splays open at top of shoulder and width of cuff is 2″ at top. Tack each side of cuff at top in seam allowance. Voila!
 Sleeve Cuff