
We’ve all been there – you’re putting on your favourite sweater, hat or socks and you spot it… the dreaded hole! While holes are indeed a devastating discovery, all hope is not lost! Beloved knitwear items that you’ve spent hours creating, or that have been made for you by a loved one can be mended and continued to be cherished using a number of fun and easy techniques. There are many ways to create visible mending. My favorite ways to visibly mend are using a simple woven technique and freeform darning. These are fun techniques I use, very easy to remember and can be explored and expanded upon to create beautiful designs.
Supplies
- Anchor® Sparkles Embroidery Hoop Frame 6”
- Coats Clark Embroidery Floss or Patons Kroy Socks for heavier knitwear
- Susan Bates 5 Pack, Steel Yarn Needles 2”
- Pair of scissors
Weaving
The first method uses a simple weaving technique to visibly mend knitwear.
Steps
1. Place Anchor Embroidery Hoop Frame around the hole in your knitwear, making sure the garment is not stretched or pulled out of shape.

2. Start stitching through existing knit using Coats Clark Embroidery Floss, leaving a long tail at the back of your project to be woven in later. Leave a few knit rows around the hole to prevent any running of the yarn.
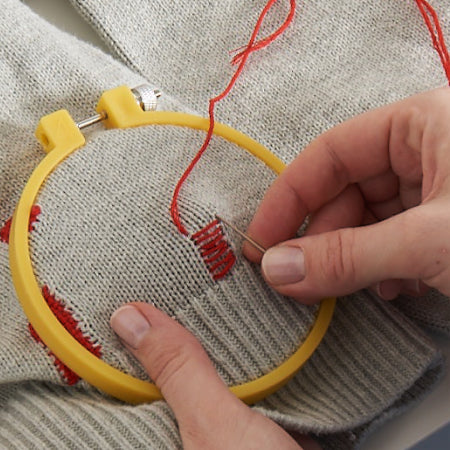
3. Create a ladder stitch by going back and forth across the hole, using the knit lines as your guides and picking up every other knit stitch. This creates the weft.

4. Working from top to bottom weave over and under each of your ladder stitches creating the warp of the plain weave. Make sure to catch any loose stitches at the top and bottom of the hole.
5. Use your needle to push the Coats Clark Embroidery Floss together creating a tight weave

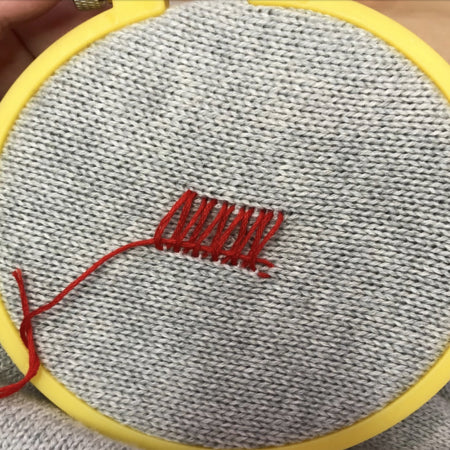
6. Continue weaving your Coats Clark Embroidery Floss until the area is filled

7. You can use different colored Coats Clark Embroidery floss for the warp and weft to create a fun pattern!

8. Make sure to weave in your ends on the back of the garment.

Weaving technique for socks
This woven technique is a great way to mend small and large holes in socks.
Steps
1. Place lightbulb, orange or darning mushroom inside the sock. You need a round object to fit the shape of the sock. I’m using a lightbulb below and it works great!
2. Continue by following the steps above.


Freeform Darning
This technique is a little more care-free in its approach.
Steps
1. Start by weaving around the perimeter of the hole. I am using Patons Kroy Socks.

2. Create horizontal woven lines that extend beyond the hole.
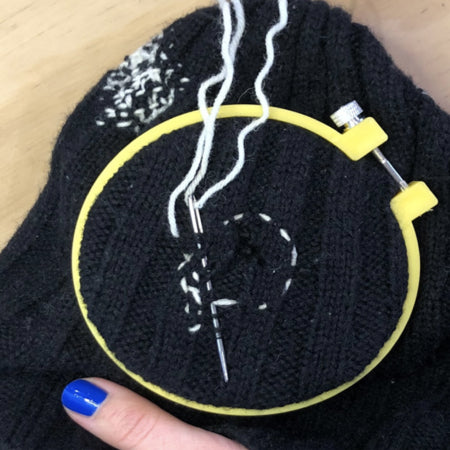
3. Then create vertical woven lines that overlap the horizontal lines. You can add in diagonal lines to fill in any gaps

4. Weave in your ends on the inside of the piece.

These are fun and easy ways to visibly mend your knitwear. For me, visible mending is not about being perfect, instead it is about making a hole or worn out area in your clothing a little more playful and beautiful.

Amber Groen is a fashion designer, enthusiastic knitter and avid mender located in Toronto, Canada. She is a graduate of Parsons School of Design.
